


การตั้งค่า DNS Server บน Windows สามารถทำได้ผ่าน Network Interface ตามขั้นตอนดังนี้:
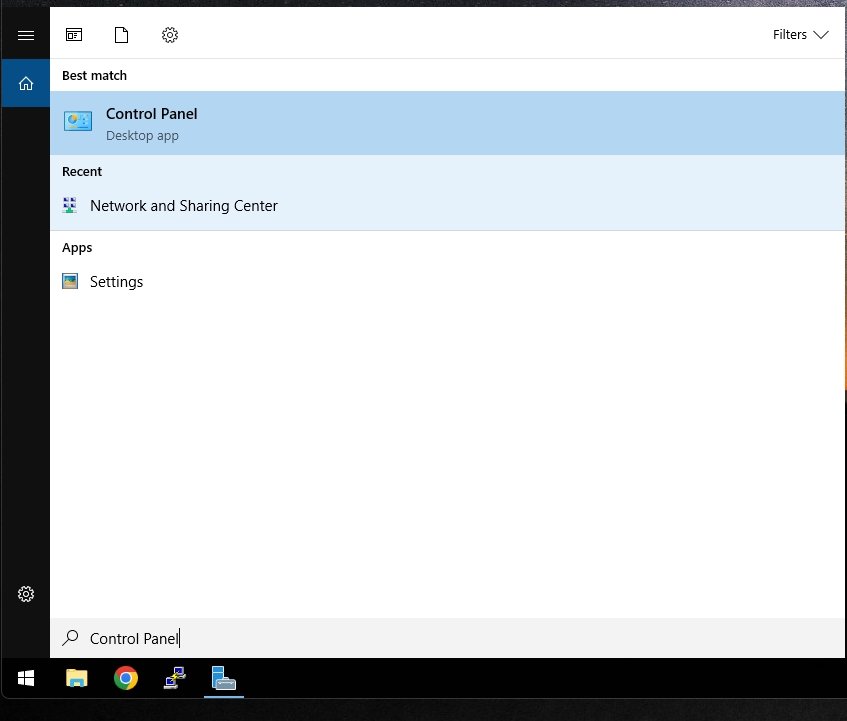
1. เปิด Control Panel
- กดปุ่ม Windows แล้วพิมพ์
Control Panel - กด Enter เพื่อเปิด Control Panel
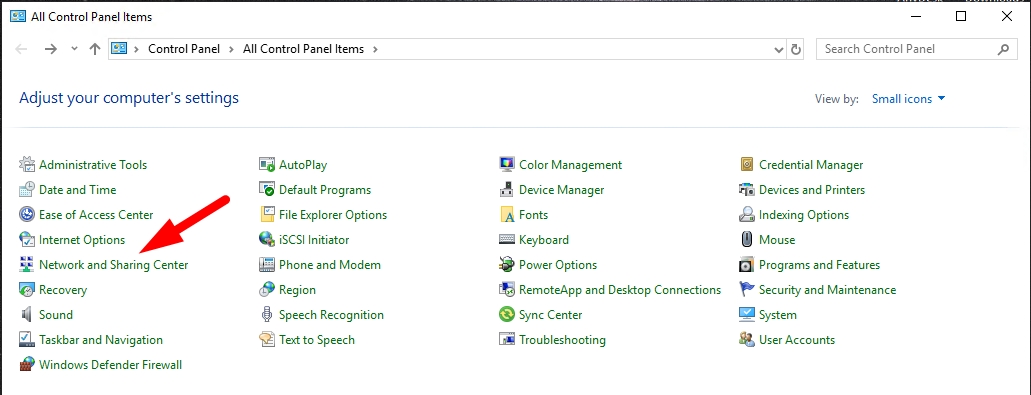
2. เข้าสู่ Network and Sharing Center
- คลิกที่ Network and Sharing Center
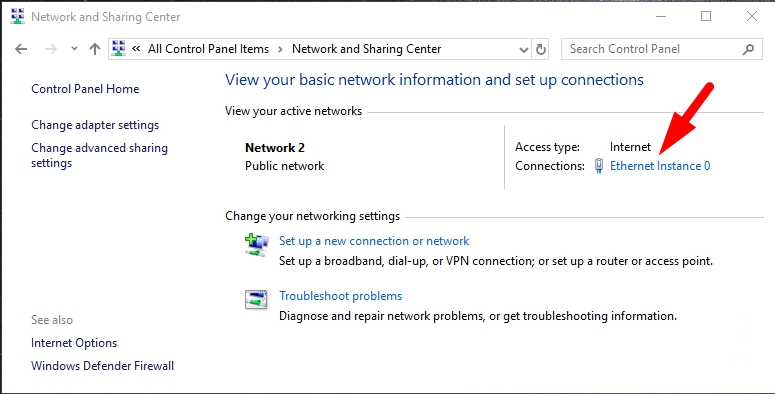
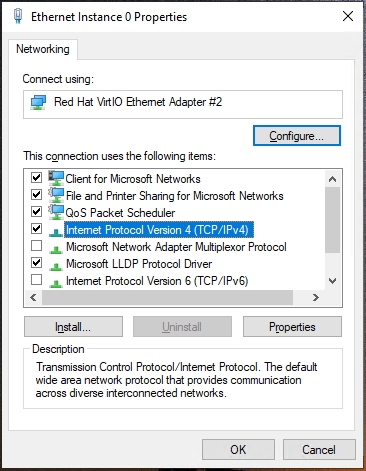
3. เลือกการ์ดเครือข่าย
- ในส่วน "View your active networks",
- คลิกที่ลิงก์ "Connections" (เช่น
"Ethernet")
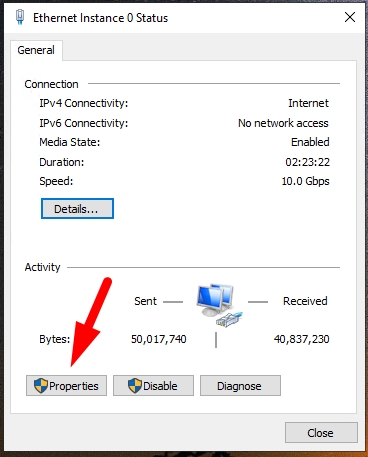
4. เปิดหน้าต่าง Properties
- คลิกปุ่ม Properties
5. เลือก Internet Protocol Version
- เลือก Internet Protocol Version 4 (TCP/IPv4)
- คลิกปุ่ม Properties
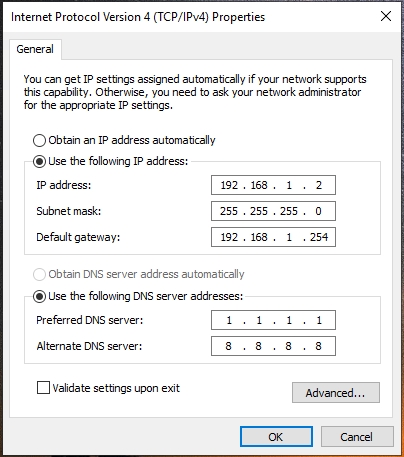
6. ตั้งค่า DNS Server
- เลือก "Use the following DNS server addresses"
- ป้อนค่า DNS Server ที่ต้องการ เช่น:
- Cloudflare & Google DNS:
- Preferred:
1.1.1.1 - Alternate:
8.8.8.8
- Preferred:
- Cloudflare & Google DNS:
- คลิก OK เพื่อยืนยันการตั้งค่า
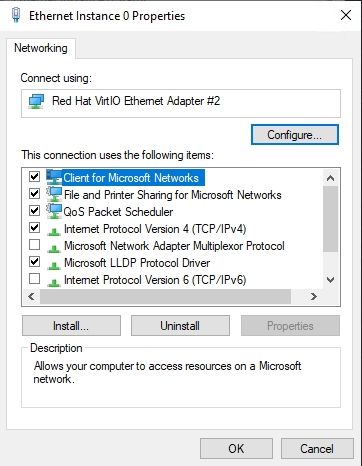
7. ปิดหน้าต่างและตรวจสอบการทำงาน
- คลิก Close ในหน้าต่าง Properties
- ปิดหน้าต่างการตั้งค่า
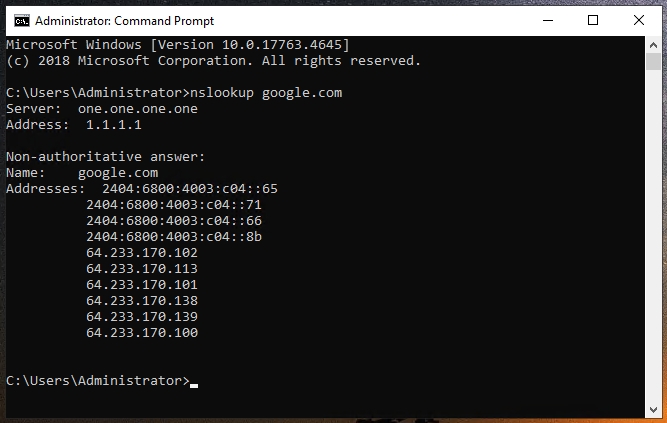
การตรวจสอบการทำงานของ DNS
- เปิด Command Prompt (
cmd)
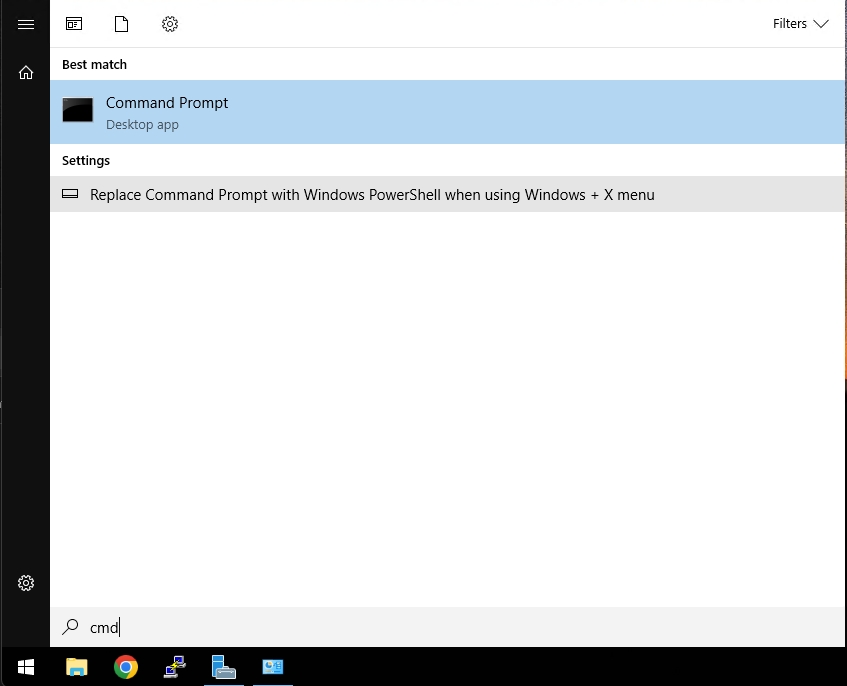
- ใช้คำสั่ง:
nslookup google.com - หาก DNS ทำงานปกติ จะแสดงหมายเลข IP ของเว็บไซต์
✅ เสร็จเรียบร้อย! เครื่องของคุณจะใช้ DNS Server ตามที่ตั้งค่าไว้
